Redux-Thunk是什么?

Reduce 中的 action 通常只负责同步的获取和更新state操作。而把异步操作放置在其他地方。等异步操作完成之后,再调用 action 进行同步操作。这是一种良好的约定规范,但也并非必须的,如果你硬要在action中进行异步操作也是可以的。
而 redux-thunk 就是为了更好的遵循这种规范而产生的。他支持我们在使用dispatch的时候,传入一个(拥有异步操作的)函数。这个函数会被传入 dispatch 和 state 。供我们在函数中使用,我们可以在函数完成异步操作之后,使用 dispatch 调用 action 。
添加 Redux 中间件
$ yarn add redux-thunk
本节课使用 redux 来实现点赞功能。环境和代码大部分继承于 《实战:点赞》,请先记得开启 redis 和 phpstudy
修改 main.js ,配置 redux-thunk 中间件
import React from 'react'
import ReactDOM from 'react-dom'
import { createStore, applyMiddleware } from 'redux'
import thunk from 'redux-thunk'
import NewsReduce from './redux/NewsReduce'
import { getAgree, setAgree } from './redux/actions'
let store = createStore(NewsReduce, applyMiddleware(thunk))
class InfoDetail extends React.Component {
constructor (props) {
super(props)
this.S = this.props.Store
}
componentWillMount () {
this.S.subscribe(() => this.forceUpdate())
}
render () {
return <div>
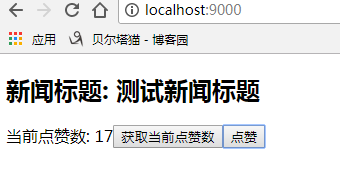
<h2>新闻标题: { this.S.getState().title }</h2>
<span>当前点赞数: { this.S.getState().agreeNum }</span>
<button onClick = { () => this.S.dispatch(getAgree(101)) }> 获取当前点赞数 </button>
<button onClick = { () => this.S.dispatch(setAgree(101)) }> 点赞 </button>
</div>
}
}
ReactDOM.render(
<InfoDetail Store = {store}/>,
document.getElementById('root')
)
添加 redux/actions.js,添加我们的异步代码
import axios from 'axios'
import qs from 'qs'

export const getAgree = function (id) {
    return function (dispatch, getState) {
        axios.get("http://localhost:8080/news.php", {
            params: {
                newsid: id
            }
        }).then(res => {
            // dispatch({type: 'GET_AGREE', agreeNum: res.data.agree })
            dispatch(NewsAction.getAgree(res.data.agree))
        })
    }
}

export const setAgree = function (id) {
    return function (dispatch, getState) {
        axios.post('http://localhost:8080/news.php', qs.stringify({
            newsid: id
        })).then(res => {
            // dispatch({type: 'SET_AGREE', agreeNum: res.data.agree })
            dispatch(NewsAction.setAgree(res.data.agree))
        })
    }
}

class NewsAction {
    static getAgree (n) {
        return {
            type: 'GET_AGREE',
            agreeNum: n
        }
    }
    static setAgree (n) {
        return {
            type: 'SET_AGREE',
            agreeNum: n
        }
    }
}
修改 redux/NewsReduce.js
let newsData = {
    title    : '测试新闻标题',
    agreeNum : 0
}

export default (state = newsData, action) => {
    switch (action.type) {
        case 'GET_AGREE':
            return Object.assign({}, state, { agreeNum : action.agreeNum })
        case 'SET_AGREE':
            return Object.assign({}, state, { agreeNum : action.agreeNum })
        default:
            return state
    }
}
知识点:
1、注册 redux 中间件的方式特别简单。
import { createStore, applyMiddleware } from 'redux'
import thunk from 'redux-thunk'
let store = createStore(NewsReduce, applyMiddleware(thunk))
2、异步和同步的区别
其实就是依赖 redux-thunk。先执行我们的异步代码,待执行完成后再次进行dispatch。