sqlacodegen: ORM实体类自动生成工具

安装
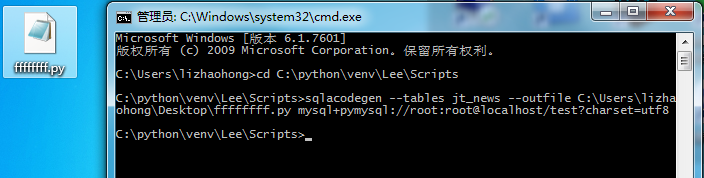
1、进入虚拟环境:$ cd C:\python\venv\Lee\Scripts
2、使用 pip 下载:$ python -m pip install sqlacodegen
3、查看相关的帮助和提示 :$ sqlacodegen --help

1.1 新建 jt_news 数据表
SET FOREIGN_KEY_CHECKS=0;

-- ----------------------------
-- Table structure for jt_news
-- ----------------------------
DROP TABLE IF EXISTS `jt_news`;
CREATE TABLE `jt_news` (
  `news_id` int(11) NOT NULL AUTO_INCREMENT,
  `news_title` varchar(50) DEFAULT NULL,
  `news_abstract` text,
  `news_updatetime` timestamp NULL DEFAULT CURRENT_TIMESTAMP ON UPDATE CURRENT_TIMESTAMP,
  `news_clicknum` int(11) DEFAULT NULL,
  `news_class` varchar(255) DEFAULT NULL,
  PRIMARY KEY (`news_id`)
) ENGINE=MyISAM AUTO_INCREMENT=23 DEFAULT CHARSET=utf8;

-- ----------------------------
-- Records of jt_news
-- ----------------------------
INSERT INTO `jt_news` VALUES ('2', 'Java开发新闻内容', 'Java新闻摘要', '2017-05-29 12:38:02', '11', '编程语言');
INSERT INTO `jt_news` VALUES ('3', 'PHP开发新闻', 'PHP新闻摘要', '2017-05-29 19:52:32', '13', 'web开发');
INSERT INTO `jt_news` VALUES ('4', 'js前后端分离开发网站项目的案例', 'javascript', '2017-05-28 19:55:59', '43', 'web开发');
INSERT INTO `jt_news` VALUES ('5', '开发中php和js结合的项目案例', '开发中php和js结合的项目案例摘要', '2017-06-04 13:59:14', '12', '实战开发');
1.2 使用sqlacodegen
由于我是在虚拟环境中安装的,所以需要先进入。然后按 pymysql 的方式创建实体类。并且放置在我的桌面中。
$ cd C:\python\venv\Lee\Scripts
$ sqlacodegen --tables jt_news --outfile C:\Users\lizhaohong\Desktop\ffffffff.py mysql+pymysql://root:root@localhost/test?charset=utf8
1.3 生成结果
生成的 ffffffff.py 的源码如下:
# coding: utf-8
from sqlalchemy import Column, DateTime, Integer, String, Text, text
from sqlalchemy.ext.declarative import declarative_base

Base = declarative_base()
metadata = Base.metadata

class JtNew(Base):
    __tablename__ = 'jt_news'

    news_id = Column(Integer, primary_key=True)
    news_title = Column(String(50))
    news_abstract = Column(Text)
    news_updatetime = Column(DateTime, server_default=text("CURRENT_TIMESTAMP ON UPDATE CURRENT_TIMESTAMP"))
    news_clicknum = Column(Integer)
    news_class = Column(String(255))
自动探测网页编码(GBK/UTF8)
安装
$ cd C:\python\venv\Lee\Scripts
$ python -m pip install chardet
EXAMPLE
新建一个package,命名Spider,接着在包中新建 Fund.py
# 基金抓取
from urllib import request
import chardet
from bs4 import BeautifulSoup

def getHtml(pageUrl):
    response = request.urlopen(pageUrl)
    raw_html = response.read()
    getEncoding = chardet.detect(raw_html)['encoding']
    return raw_html.decode(getEncoding)
index.py
from Spider.Fund import getHtml

page_url = "http://fund.eastmoney.com/fund.html"
result = getHtml(page_url)
print(result)